Create an engagement team
When you are preparing to work on a new engagement, mid- and large-sized organisations may need to create an engagement team. As a partner or person assigned with the authority in your firm, you will need to review the staff members’ workloads and assign team members who will have time available to work on the engagement.
Answer:
If you use tasks in Caseware Cloud to manage your staff’s activities, you can review the tasks that are currently open to identify which staff members you can assign to the new engagement team.
1. Ensure that you have the Entities Admin role or equivalent privileges.
2. From the Cloud menu, select Activities.
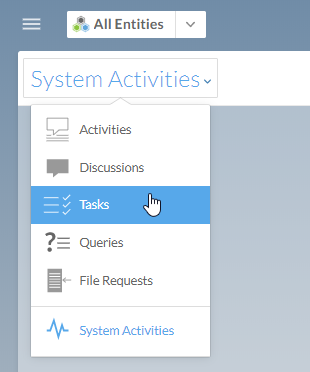
3. Select the System Activities dropdown menu, then click on Tasks. Refer to the image below.
4. Select the filter icon, and then choose Status | Open to view open tasks only.
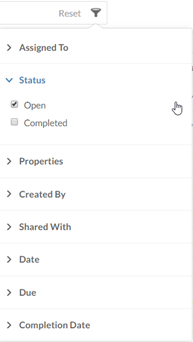
Here, you can review the list of open tasks for your different staff members. This will help you determine which staff members are available to work on your new engagement.
Once you have identified the staff members who you will be assigning to your engagement team, you can create a new group in Cloud for this team.
1. Ensure that you have the Staff Admin role or equivalent privileges.
2. From the Cloud Menu, select Groups.
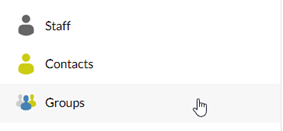
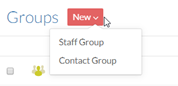
3. Select New, then choose Staff Group or Contacts Group. The New Group dialog opens.
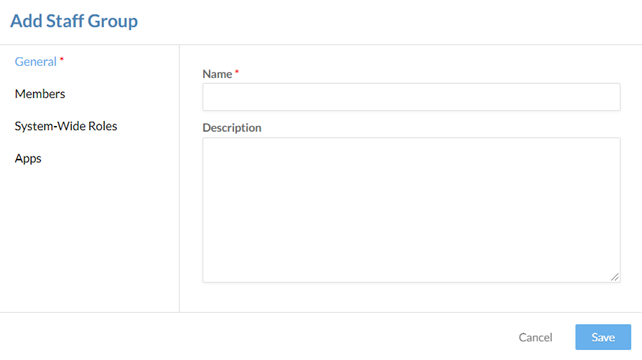
4. Enter a Name and Description for your group.
5. From the sidebar, click on Members. Choose the users you want to add to this group.
6. If you have the Admin role or equivalent permissions, you can also assign System-Wide Roles.
7. Click on Save.
You have successfully created a Cloud group for your engagement team.
Now that you have created your specific engagement team, you can assign the team to the relevant client workspace where you will be publishing your engagement. You will assign the group for your engagement team to the client entity.
1. Ensure that you have the Owner role or the equivalent privileges for the entity.
2. Expand the Cloud Hamburger menu / Cloud menu, then click on Entities.

3. Choose the entity you want to grant access to by clicking on the checkbox /radio button on the left-hand side. Wait for the secondary menu screen to appear on your right, then click on Share.
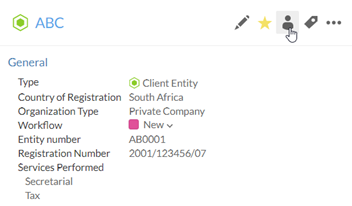
4. Search for the groups, staff members or contacts you want to grant access to, then click on Assign Roles to (#) and choose the appropriate role. Any roles that users already have due to previous settings appear under Inherited.
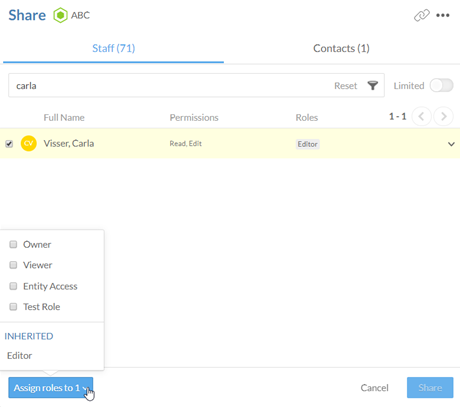
5. Click on Share.
6. All the members of your engagement team now have access for the client entity for this new engagement. Based on the role you chose; the team members will be able to view and work with the files and activities in this client workspace. For more information about creating an engagement file, see Create an engagement file.
Now that the engagement team is set up, you can start to prepare the content for your engagement by publishing or uploading client files.
Rate this article: