How to use the Risks & Controls feature on the IA Engagements App
Instructions:
The Risk & Controls feature enables the auditor to define, manage, and link risks and controls relevant to the engagement. This forms the foundation for risk-based auditing and supports the development of the RACM and work program.
The feature consists of two separate sections:
Risks
Capture identified risks related to the achievement of the activity objectives.
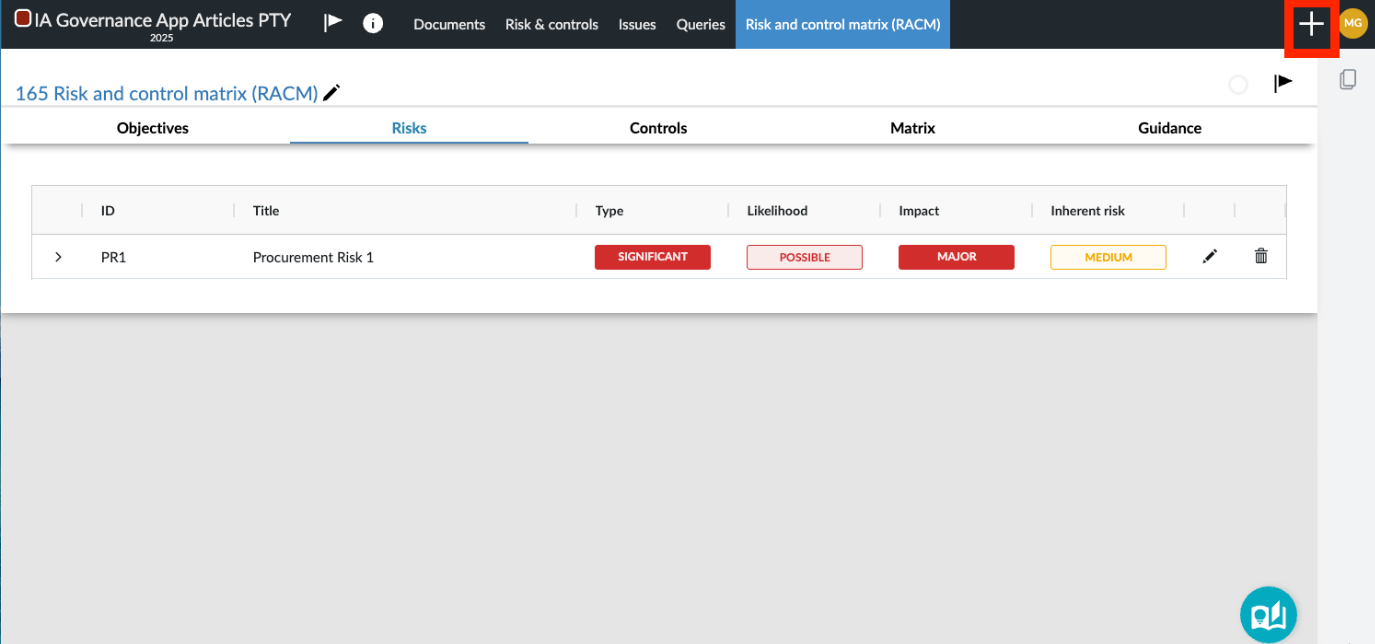
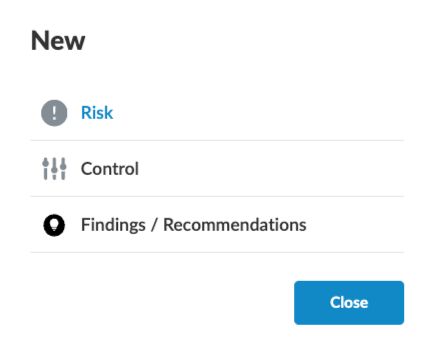
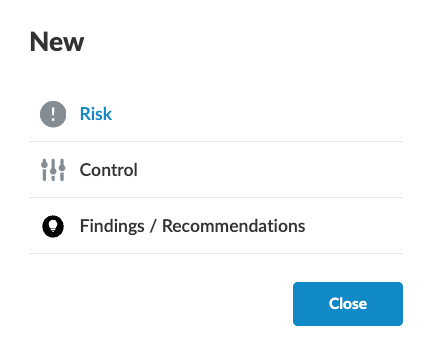
To add a risk, select the + button. A dialog will open requiring the user to choose between a Risk, Control or Findings / Recommendations. Choose Risk.
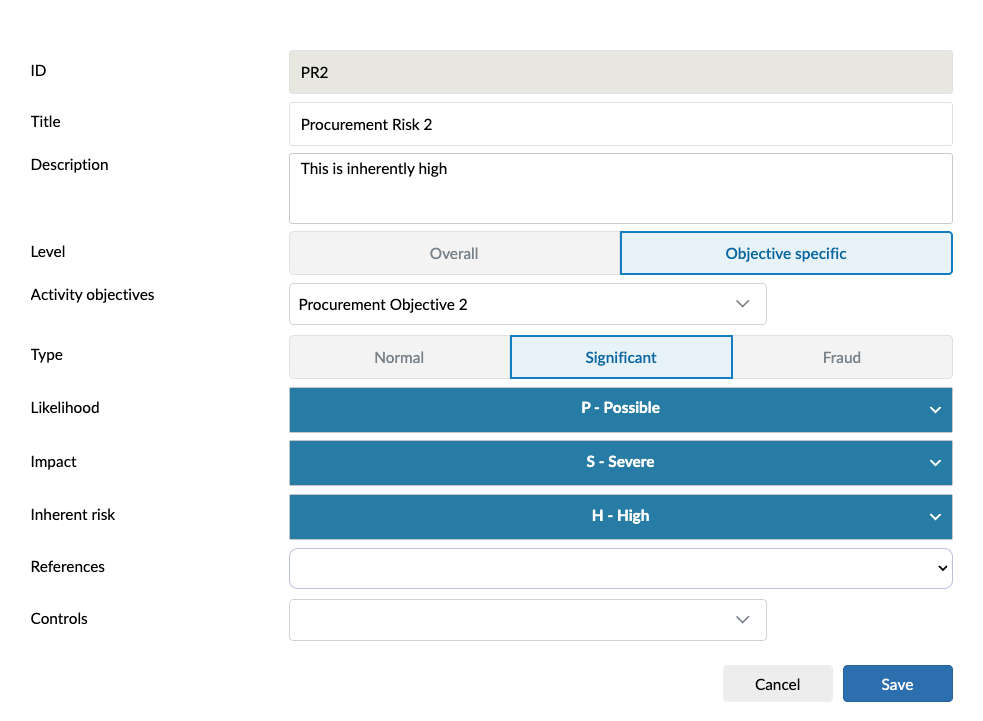
Selecting Risk will open the following screen that requires the user to complete the initial details of the risk.
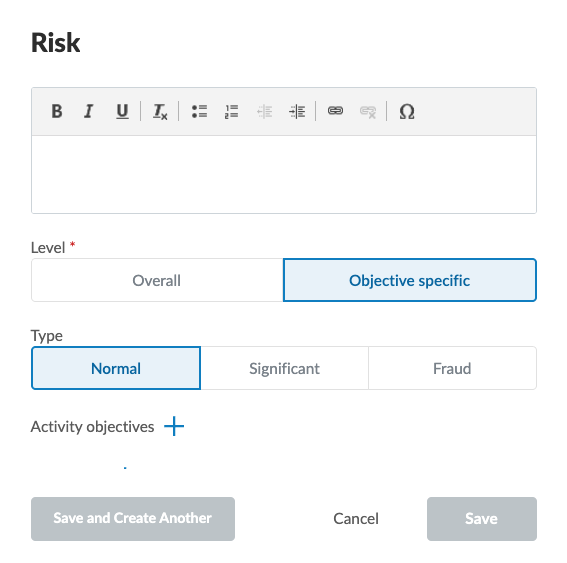
Initial fields for completion include:
- Title
- Description (cause, event, impact)
- Level (overall or objective-specific)
- Type (normal, significant, fraud)
- Activity objectives (Only if objective specific)
- References (If other areas of the engagement need to be referenced)
When all relevant fields have been completed, the Save button becomes available for selection.
Note: Newly added risks will only be visible when the page is refreshed.
Note: The risk assessment is not complete at this stage.
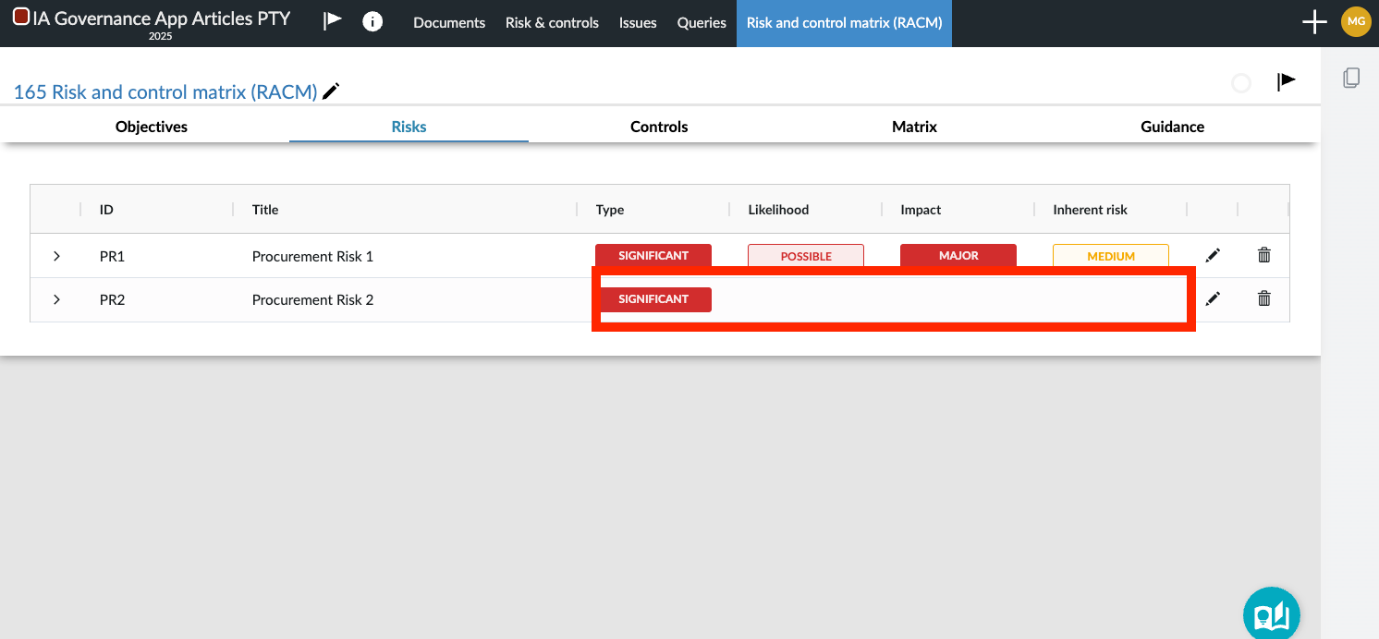
The user must select the edit button in order to complete the assessment of the specific risk, or make changes to the initial assessment. Additional fields available for completion are:
- Inherent Risk (The system calculates inherent risk automatically)
- Controls (if no controls have been identified yet, they can be created in the next step).
When all relevant fields have been completed or required amendments made, select Save.
Controls
Capture controls linked to risks.
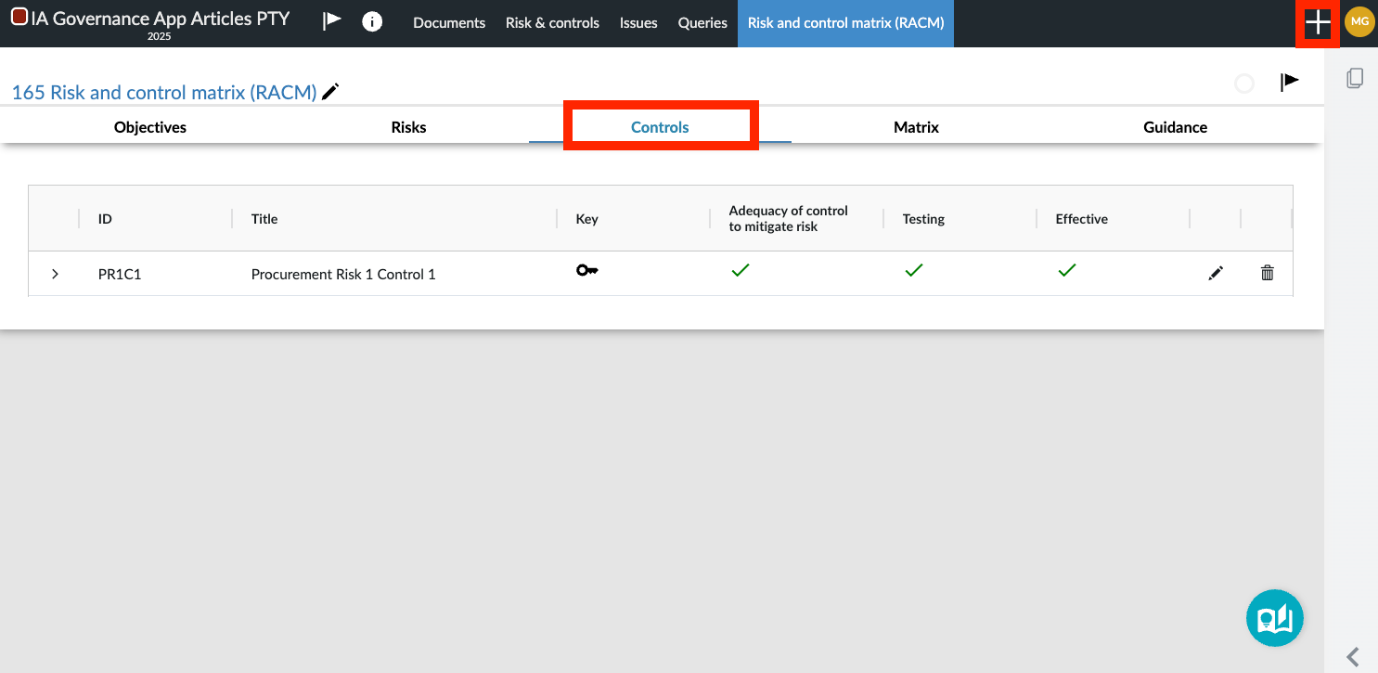
To add a CONTROL, select the + button. A dialog will open requiring the user to choose between a Risk, Control or Findings / Recommendations. Choose Control.
Selecting Control will open the following screen that requires the user to complete the initial details of the control.
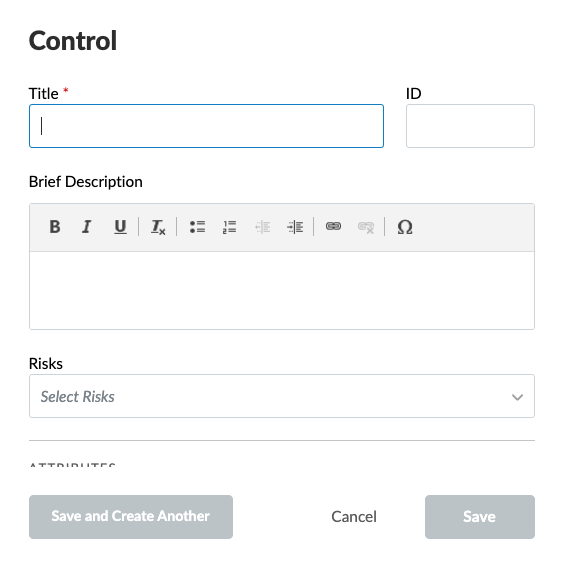
Initial fields for completion include:
- Title
- Brief Description
- Risks (Risks can be linked at a later stage)
- Frequency (How often the control works)
- Execution (manual or automated)
- Classification (e.g., preventative)
- Key control indicator (yes or no)
When all relevant fields have been completed, the Save button becomes available for selection.
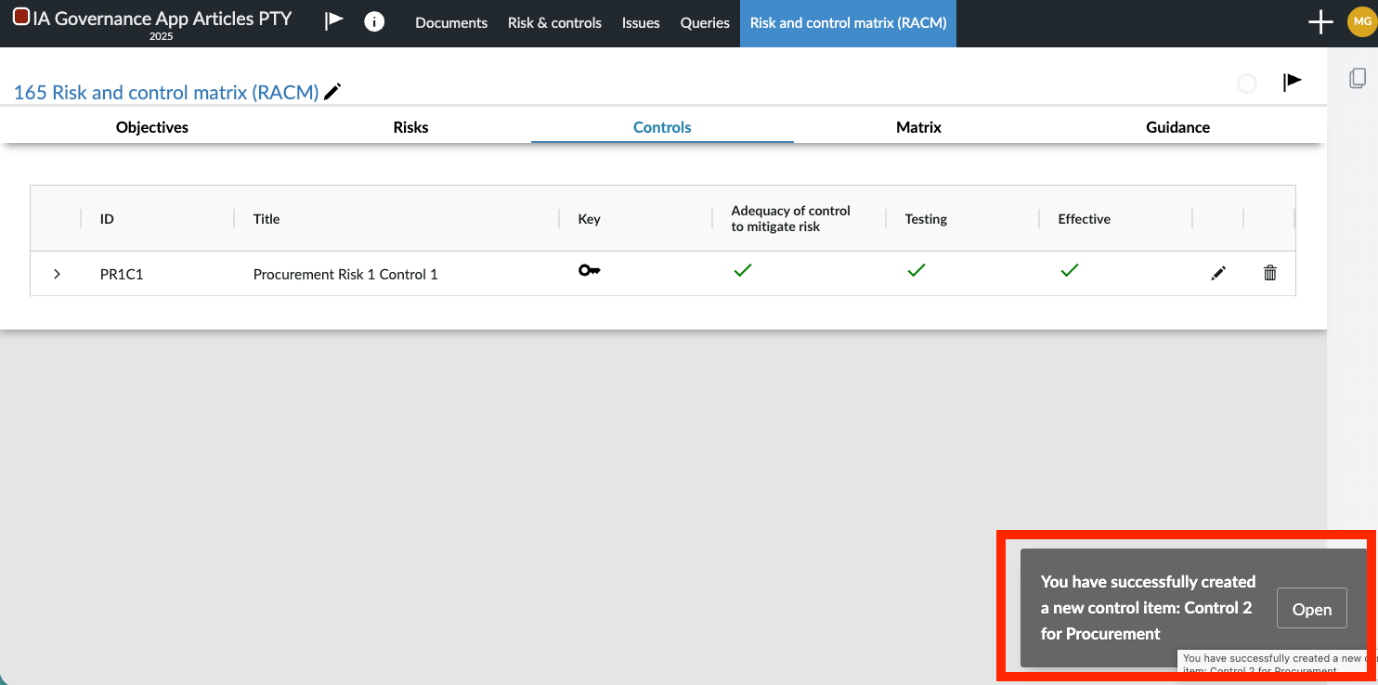
Note: The control is not complete at this stage. A prompt will appear for a short while in the bottom right-hand corner, which will open up the control for completion or further editing. If the prompt is not selected, the page will need to be refreshed for the control to appear on this page.
The user must select the edit button in order to complete the details of the control, or make changes to the initial control description and selections. Additional fields available for completion are:
- Linking a risk
- Classification (Preventative or detective)
- Adequacy of control (Satisfactory or Unsatisfactory)
- Design reference (link to another part of the working papers)
- Test this control (only available if the adequacy is satisfactory)
- Control is effective (only available if the adequacy is satisfactory)
- Evaluation reference (link to another part of the working papers)
- Notes on control testing (any additional notes)
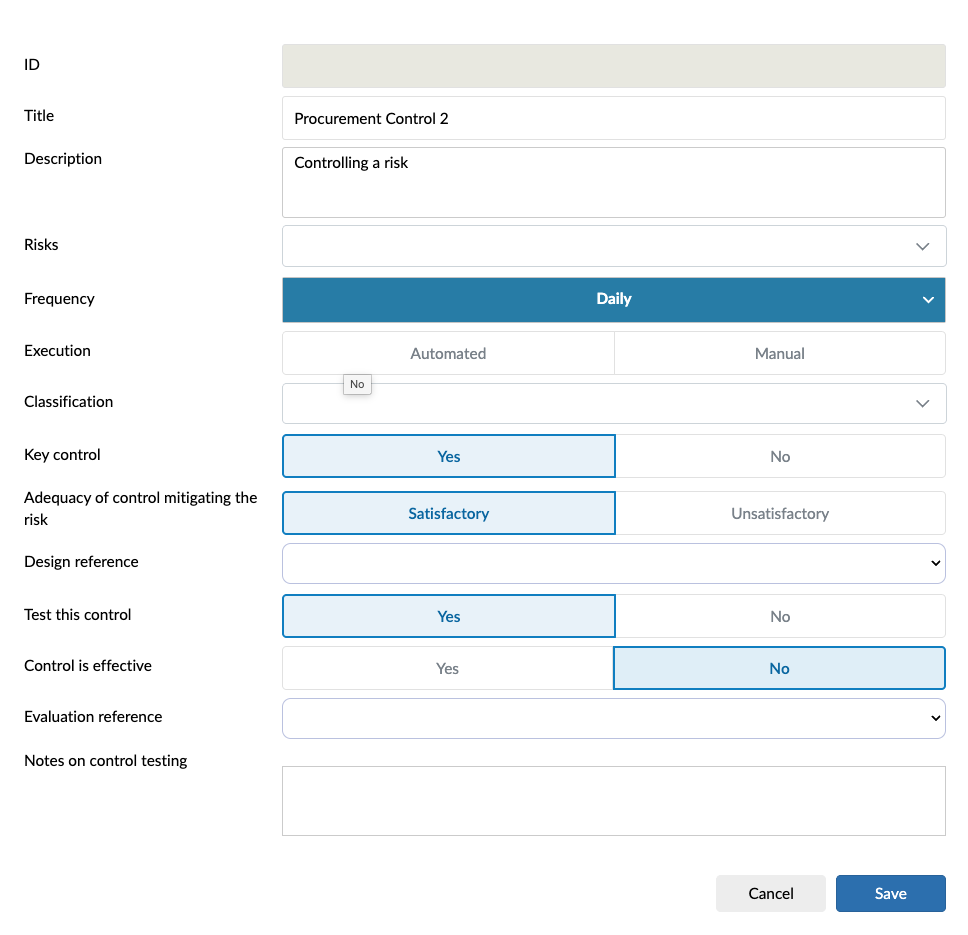
When all relevant fields have been completed or required amendments made, select Save.
Important Considerations
- Risks and controls must be clearly defined and linked to support risk-based auditing.
- The structure follows the RACM methodology, ensuring consistency across planning and execution.
- Risks drive the development of audit procedures, while controls form the basis for testing activities.
Important Tips
- Always define risks using a cause–event–impact structure.
- Ensure every key risk has at least one linked control.
- Classify risks correctly (Normal vs Significant vs Fraud) to support prioritisation.
- Clearly describe controls so they can be tested effectively in the work program.
- Avoid capturing controls without linking them to risks — this breaks the audit trail.
Rate this article:
|vote=None|
Processing...
(Popularity = 0/100, Rating = 0.0/5)
Related Articles
view all...
Search Results
Editing Financial Forms in a Client Profile
Adding Financial Forms to a Client Profile
Roll Forward of a Client Profile
Why can’t I see a client’s profile on my list of clients?
Can I edit a client authorised signer?
view all...