The denial function closes a request, which makes it no longer available to auditors.
Answer:
1. Select the other response button located at the base of the form.

2. From the list of other response options select deny.

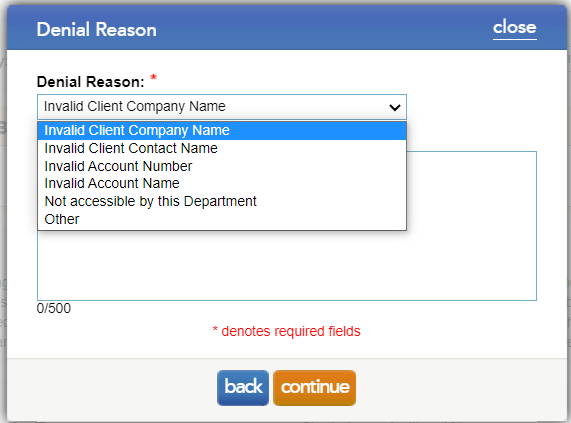
3. From the drop down list, choose a denial reason. Available options include:
- • Invalid Client Company Name
- • Invalid Client Contact Name
- • Invalid Account Number
- • Invalid Account Name
- • Not Accessible by this Department
- • Other

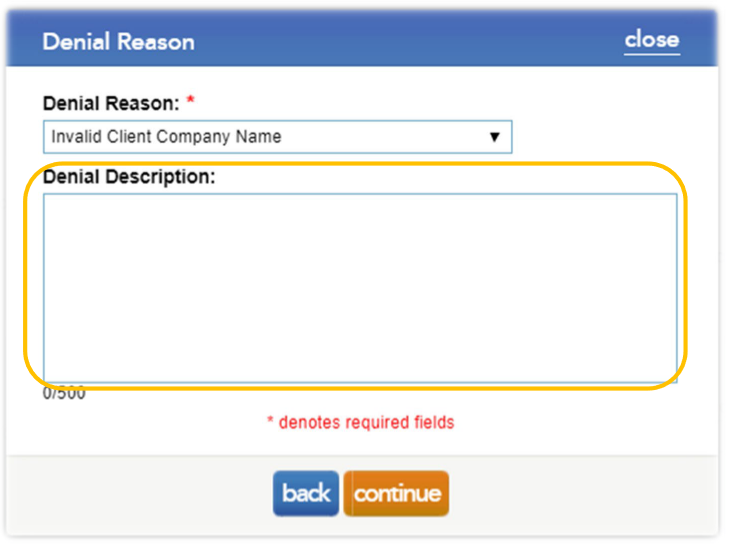
4. Type the reason why the requests were denied in the Denial Description and select continue.

We encourage you to provide auditors sufficient detail to initiate their requests correctly. E.g. The second authorised signatory, J Smith, is not a bank mandated signatory. This account requires 2 signatories to authorise the release of information. Please provide an alternative signatory.
Note: Confirmation is a transactional based system that charges audit firms when they initiate requests. The “Not accessible by this Department” option automatically generates a refund to the same requesting auditor for that request, whereas the other available denial options do not. It is recommended that users choose the “Not accessible by this Department” option when denying requests and specify the purpose of the denial in the Denial Description comment box, so that the auditors will receive a full refund with denied confirmations.
Rate this article:
|vote=None|
Processing...
(Popularity = 1/100, Rating = 0.0/5)
Related Articles
What do I do if I can't locate the Account ID or Client Name requested? (New Version of Confirmation)
Editing the Company Registration Number
What if the Account ID requested was closed for the As of Date (New Version of Confirmation)
Can my client signer give authorisation to multiple companies at the same time?
view all...